WordPress on AWS - Part 1: Deploying WordPress on AWS EC2
Configuring MySql RDS instance
WordPress uses MySql as datastore. You can install MySql on the same box which hosts the web server. Well it is not a good idea, as you will run into a risk of loosing data if the instance gets corrupted. Moreover you will have to configure the database snapshots manually. Creating a RDS instance will take away these headaches.
-
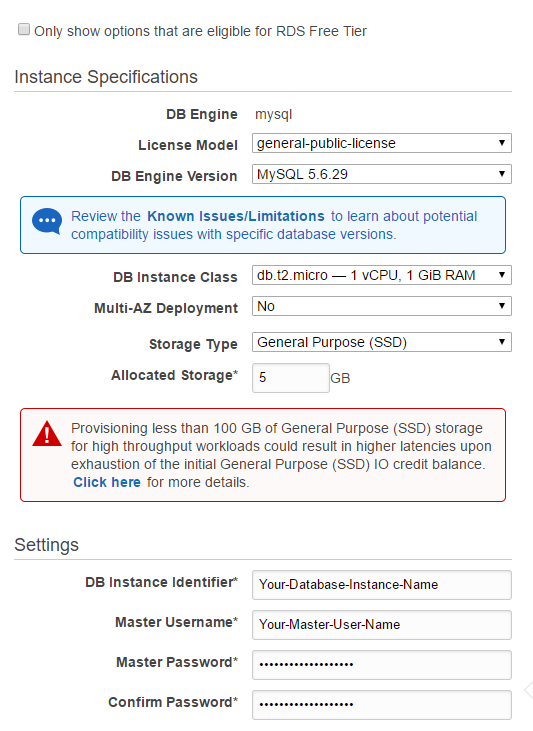
Open RDS console and launch MySql instance. I have used db.t2.micro Instance as it is eligible for RDS Free Tier. Here you will be entering the DB Instance name, Master UserName and Password.
-
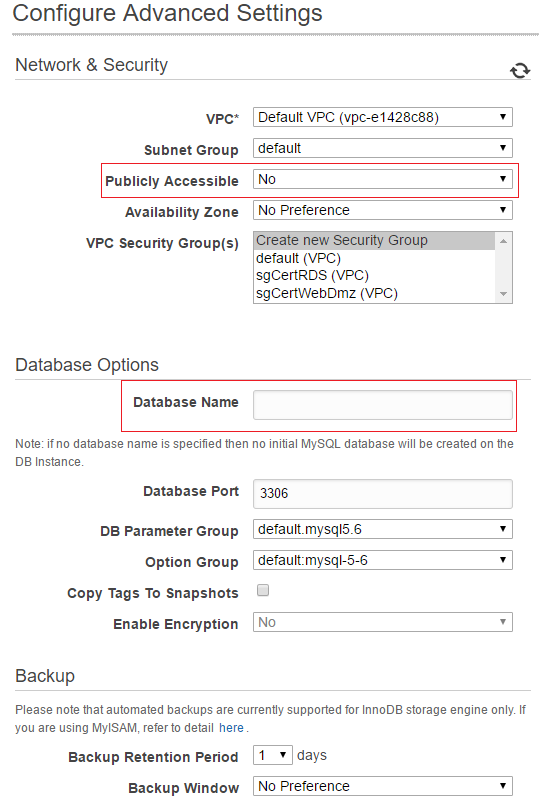
Enter the database name on Configuring Advance Settings screen. Set Publicly Accessible to No, leave all the options as default and Lunch the instance.
-
Make a note of the endpoint once the RDS instance is provisioned. You will need this endpoint while configuring WordPress site.

Configuring Security Group
A security group acts as a virtual firewall that controls the traffic for one or more instances. In this section we will create a security group for the EC2 instance and will modify security group attached with RDS instance. We need to make sure that web server will be able to connect to RDS instance and RDS instance is only accessible via web server.
- To create a Security Group, open EC2 console, select Security Groups and click on Create Security Group button
-
On Create Security Group form, enter security group name, description and leave VPC as default value. Add the rule as shown in the image below
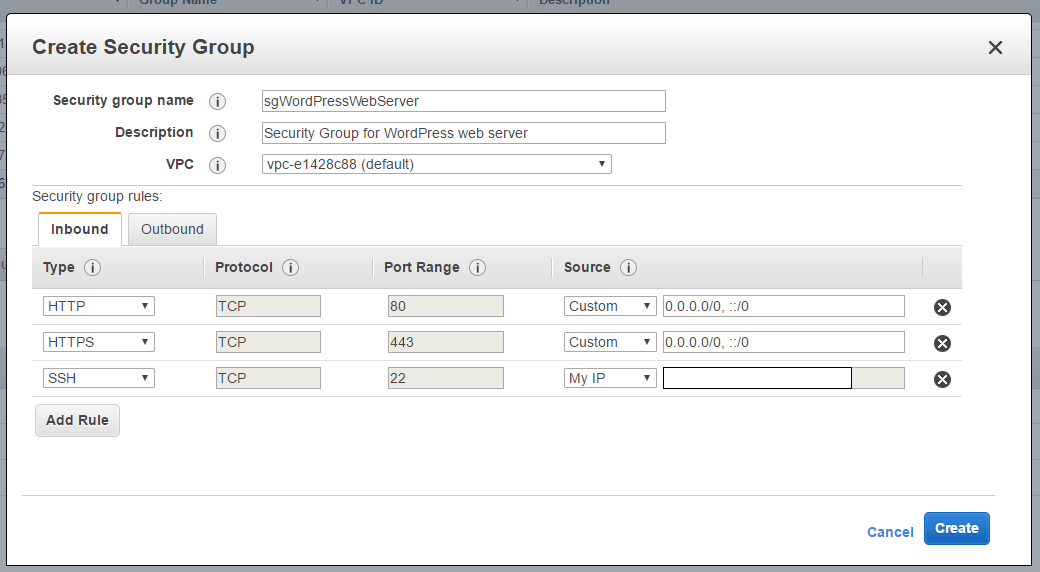
Please note that I have restricted the SSH access to my IP address as this will prevent any unwanted access to this instance. This form will automatically populated your IP address when you select My IP option.
-
While provisioning the RDS instance, we selected Create new security group option for VPC Security Group(s). As a result of which, AWS will create a new RDS security group “rds-launch-wizard”. We will now edit this security group to restrict access of RDS instance to the web server. From Security Groups list, select “rds-launch-wizard”, go to Inbound tab and click on Edit. Select Custom option and enter the name of Security Group you have created for web server “sgWordPressWebServer”.

Deploying an EC2 Linux Instance
- Provision an EBS-backed Amazon Linux instance. For more information, see Getting started with Amazon EC2 Linux Instances. In this case, I have used T2-Micro instance as it falls into free-tier for the first 12 months.
- Make sure you select the web server Security Group “sgWordPressWebServer” which we created previously.
Installing Apache web server
- Connect to your EC2 instance
ssh ec2-user@<instance-public-ip> -i <key-pair-file> - We need to ensure the software packages on your instance is latest. Perform a quick software update.
sudo yum update -y - Check if Apache is already installed
sudo service httpd status - If Apache is missing, install Apache.
sudo yum install httpd -y ``` - Check if Apache is installed.
sudo service httpd status - If Apache is not running, start httpd service
sudo service httpd start - Let us ensure that httpd service starts automatically
sudo chkconfig httpd on - Add SSL/TLS support to Apache
sudo yum install -y mod_ssl
Installing Worpress
- Install php and php-mysql for WordPress
sudo yum install php php-mysql -y - Download latest version of WordPress
wget https://wordpress.org/latest.tar.gz - Extract the content from lateset.tar.gz and move it to /var/www/html/ directory
tar -xzf latest.tar.gz cp -r wordpress/* /var/www/html/ - Remove latest.tar.gz and worpress directory from the current directory
rm -rf worpress rm -rf latest.tar.gz - We need to make sure that Apache has to /var/www/html/ and /var/www/html/wp-content/ directory. This will allow Apache to update the config files when you configure your WordPress site.
cd /var/www/html/
sudo chmod -R 755 wp-content
755 – This set of permission is commonly used in web server. The owner has all the permissions to read, write and execute. Everyone else can only read and execute, but cannot make changes to the file.
sudo chown -R apache.apache wp-content
sudo chown -R apache:apache /var/www/html/
You will not be able to install plugins or themes if Apaches doesn’t have right to update /var/www/html/ folder.
- Restart Apache web server
sudo service httpd restart
Configure WordPress site
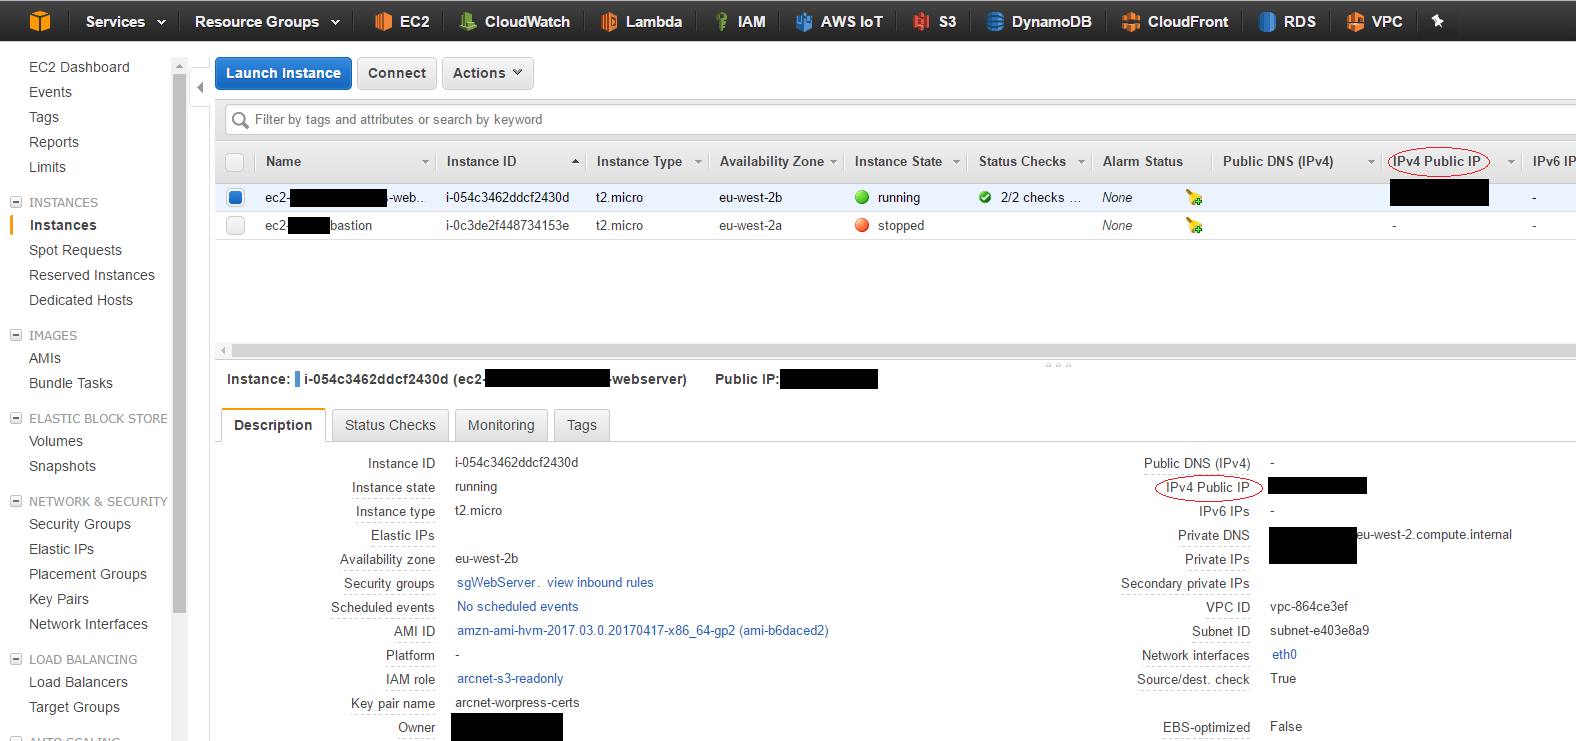
You would be able to browse to your WordPress site by using the public IP of the EC2 instance. Open EC2 console to find the public ip.
If configured correctly, you will see the WordPress welcome page.
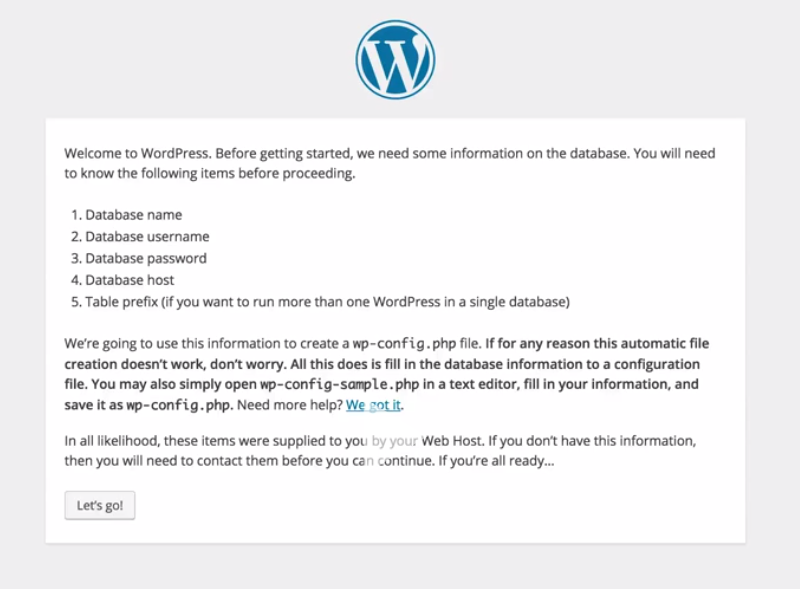
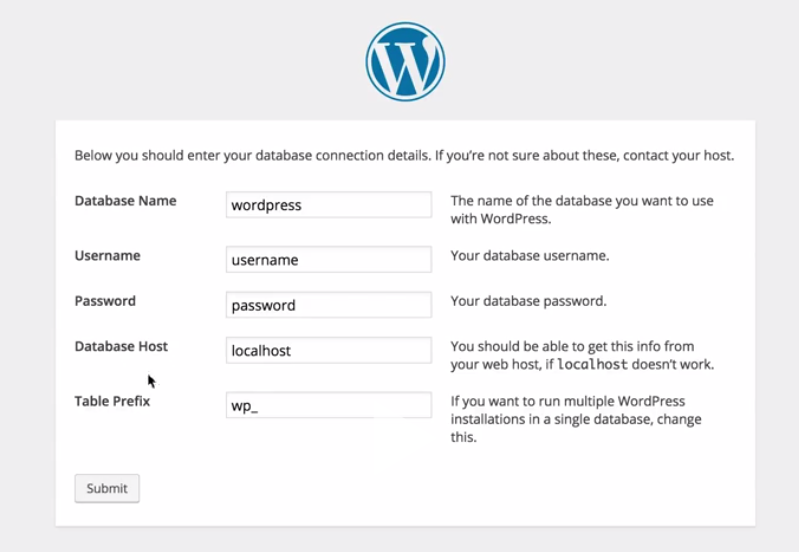
We will now go in and configure WordPress. Enter the details of RDS instance we created previously. Enter the RDS endpoint in Database Host section and click Submit.
We will now be redirected welcome screen.
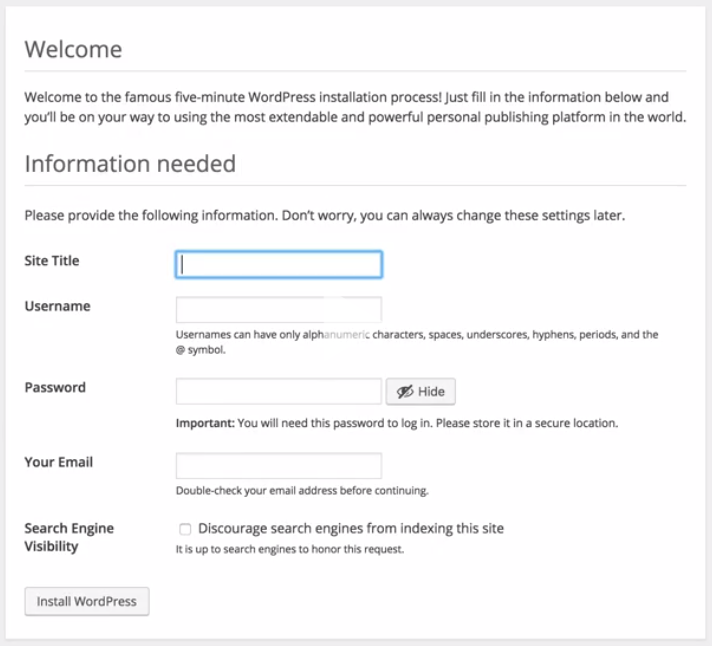
Enter details of your site and click on Install WordPress. With any luck we will not see any issue and will be redirected to login screen.
So far we were able to access the blog via public IP address of the server. In the next post Configure domain name routing to Ec2 instance, I will take you throught the process of registering a domain using Amazon Route 53 and configure a simple routing policy to route traffic to your WordPress site.